We typically respond the same day


Table of contents
Are you frustrated with your email campaign process? Are you spending a lot of time in creating and sending the same emails time and again? Are you looking forward to the best way to improve your email marketing game? Well! That’s where HubSpot email templates come into play.
With the help of email template in HubSpot, you can save a lot of time in creating repetitive email content. Indeed there are various HubSpot email templates available both for free and paid, but customizing your email template can actually take your campaign to the next level.
Now, you might be thinking that to design and develop email templates, you need to have good coding.
Are you still pondering over how to create email templates without any technical skills? All thanks to HubSpot.
It provides us with an effortless way to develop an email template. It offers drag-and-drop functionality, that allows us to design email templates without any coding.
Want to know how? Well! This article will surely help you make email template in HubSpot. By simply following the steps added below will help you know how it works, and you will be able to design templates with zero coding knowledge.
Steps to create Email Template in HubSpot without Coding
Let’s begin!
Step 1: Login your HubSpot Account
Login your HubSpot account and go to Marketing > Email.

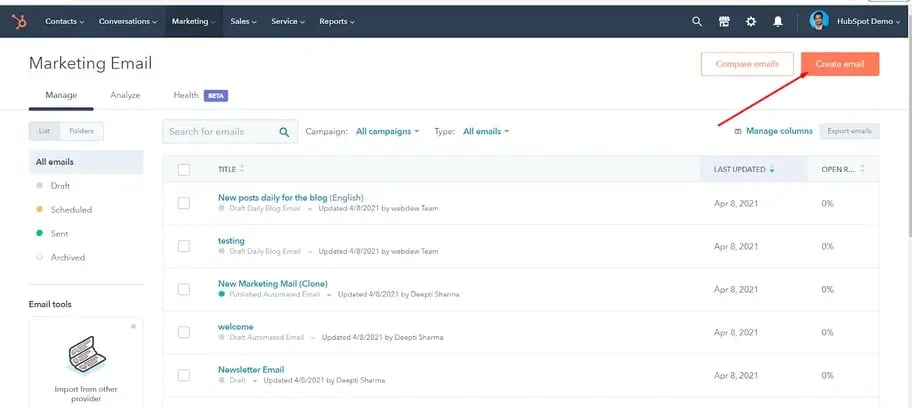
Step 2: Create Email
Click on Create Email button at the top right of the screen.
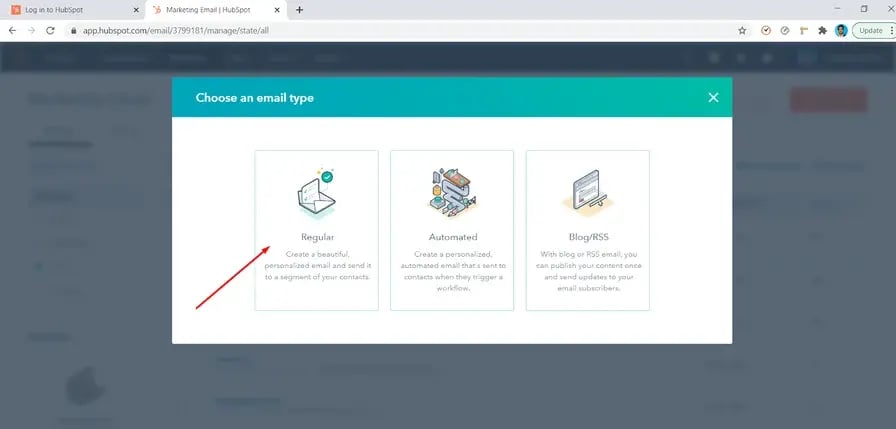
Step 3: Select Email Type
A block will open where you will see different email types. Here I have selected “Regular” email type and moved further but you can choose the email type as per your needs.
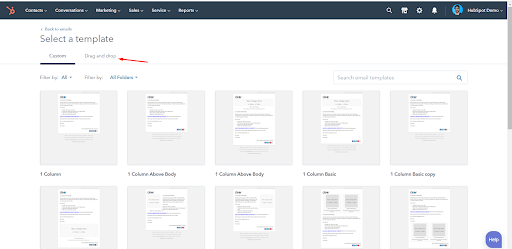
Step 4: Drag-and-drop Editor
Now, you will be redirected to a dashboard, where you have to select a template. Now, there are two options, the first is custom, and the second is drag and drop. And, for making templates easily we go with the drag and drop option.
Step 5: Select a Template
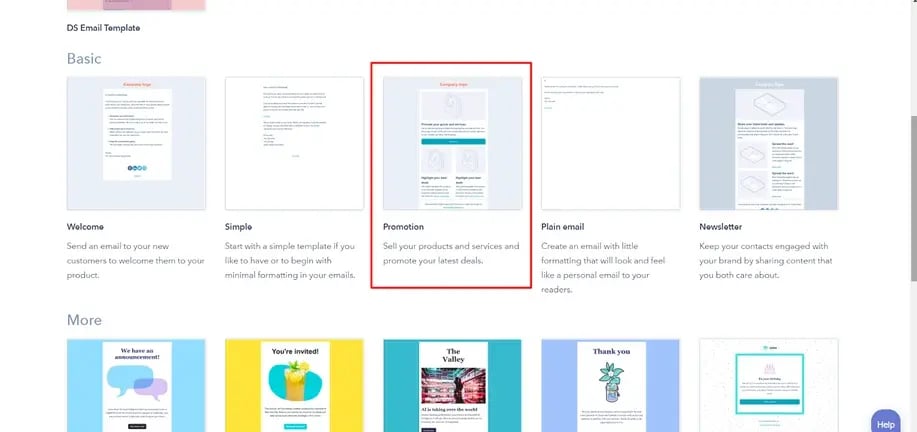
Now, select one of the best HubSpot email templates that fulfill your needs from the list of all HubSpot drag-and-drop templates.
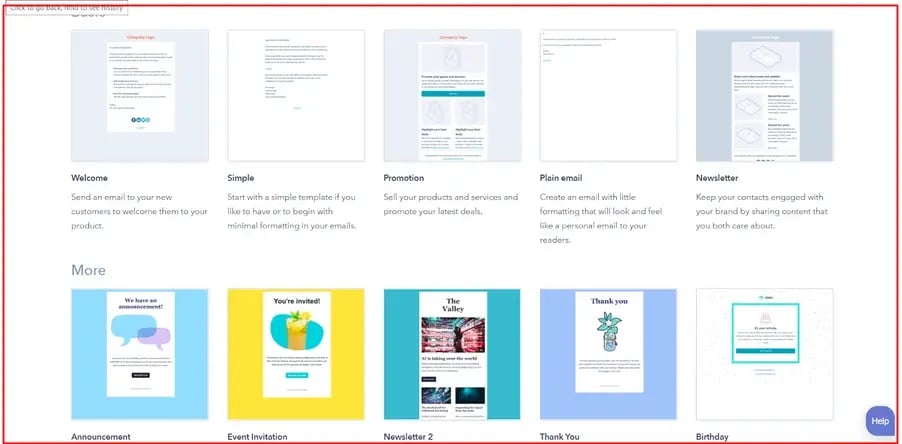
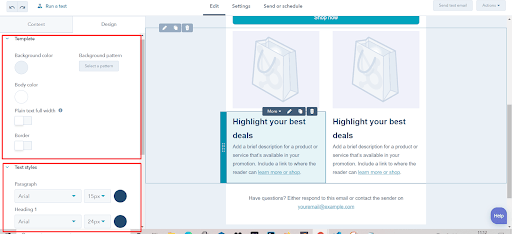
Step 6: Promotion Template
Here, I have chosen the Promotion template. Well! You can select any template of your choice.
Step 7: Create an Email Template
You will redirect to the blog editor page. Here you can now create an email template without zero technical knowledge as per your own requirements.
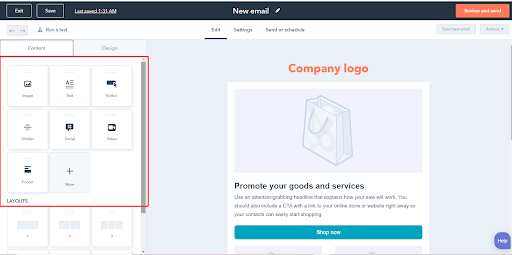
Just navigate to the left side of the page and use these drag-and-drop modules to create an excellent email template. It includes images, buttons, text, social, divider, video, footer, etc.
Now, let’s understand the usage of each module in detail.
Image Module
The image module is basically used for adding images to your email template. Just drag and drop the module in the template and choose your image by clicking browse image or upload on the left side.
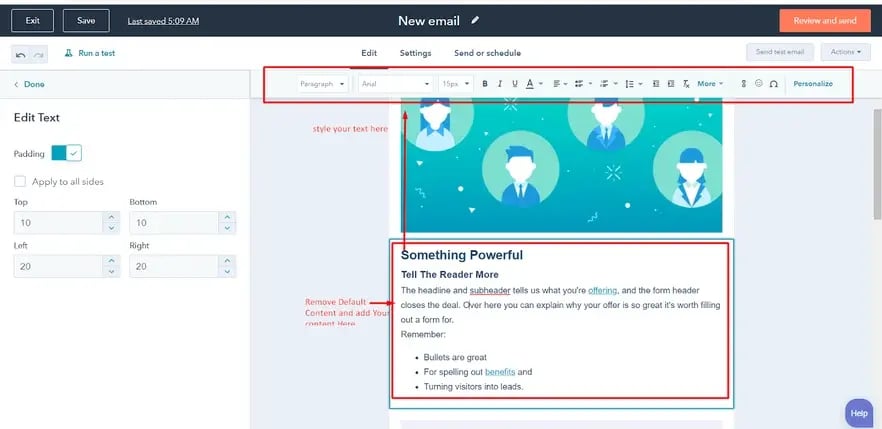
Text Module
With the help of the text module, you can insert text into your template. Simply drag the text module and drop it where you want to add it to the template.
To know-how, simply follow the below-added video.
Button Module
It is another module that you might have to use in every email template you create. It is commonly used for adding button Links in your template. This module provides all button options like font, link, size, color, etc. Just drag and drop it into the template from the left-side module list.
Divider Module
It is another module that is commonly used for showing the separation between two sections or blocks. It’s like a line that separates two different sections. So, if you want to show separation in your blog template, you can always use a divider module by following the below-added video.
Social Module
By using this social module, you can redirect the user from email to your social media page or profile. Just drag and drop it and add links to your social media in your email with this module. Look at the below-added video for know-how.
Video Module
If you want to insert some video in your email template, then you can make the best use of the video module using the drag-and-drop option. In this, you can also add embedded code to YouTube videos and style the play button on the video.
The best part is that all the module-adding criteria are the same i.e., just drag and drop and edit. That’s why HubSpot CMS is preferred by many.
Footer Module
Whenever we select an email template, the footer is the area that is set in the template by default. But you can edit, and delete default footers, and can even design new footers by using this module. So, start using this content and add content to your design requirements.
More Module
Furthermore, you can use more custom modules in your email templates. Just click on “More”, and you will see all the custom modules that are stored in the backend.
You can search for the module name and then just drag and drop the module. But personally, I don’t recommend you to use a custom module if it’s not too necessary because templates have their default width and responsiveness.
If you add a custom module, make sure the module should match the working way of the HubSpot email template. But first, try to make your email template design by using HubSpot’s default predefined modules.
Step 8: Use Drag-and-drop
Besides modules, you can also drag and drop layouts of columns.
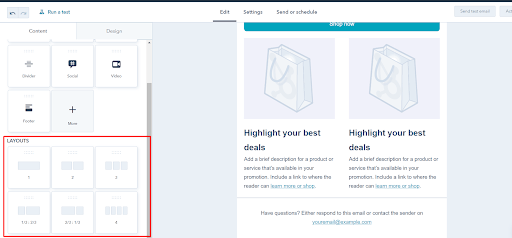
The drag-and-drop templates provide a maximum of four columns for adding modules in a single row. It means that in a single row, you can add a maximum of four blocks and a minimum of 1. You can drag and drop your module according to these columns.
Step 9: Customize Template
In your email template design, you can also set the background color, font families for text and text color for the template, etc. You can also do this step at the starting of your process.
Step 10: Save Template
Once you are done with all the updation, simply click on the Save button and send it to your email. But make sure you preview the final design before saving it. Also, you can send the email template to your id for testing purposes. Thus, make sure you test the email template before sending the email. Just follow the steps to proceed with the email testing.
Prefer reading- HubSpot Email Drip Campaign- How to create one with the best example
The Final Verdict
Congratulations! You have successfully created your HubSpot responsive email template without the assistance of the developer.
Indeed, email marketing is an integral part of a marketing strategy. So, if you want to see good results, start harnessing the power of email templates.
Still, if you face any hurdles in designing emails in HubSpot, feel free to jump on a call with us.
Editor– Divya Verma
Dive Into our
Client Testimonials
Listen to business owners like you share how we’ve helped them grow. Your story could be next!


.svg)
“Recently we reached out to Webdew for a website inside of HubSpot and they also did some mocking automation for us.”
“Webdew team was quite honest and quite easy to work with in terms of taking feedback implementing it, showing that it doesn’t happen again and things like making sure that it meets our expectations.”
“We worked with webdew to help us build our HubSpot website and they did an amazing job with it. They were very quick.”
“webdew has helped us optimize the sales and marketing processes, and this is automating a lot of processes.”
“Hi everyone my name is Kara and I work as a channel consultant at HubSpot Singapore. I’ve been working closely with webdew agency”
“Hi my name is Christian from OpenDoors Mortgage team and I’m in the mortgage business and just trying to work on new projects and kind of incorporating HubSpot for my operations”
“I’m one of the technology directors for Travelopia. We are the largest experiential travel company in the world. We’ve engaged webdew recently, not recently, it’s been about a couple of quarters now.”
“We worked with Chehak over the past several months to create a series of animated videos for an academic planner that we produce. And from the very beginning, she was absolutely professional and a pleasure to work with.”


6x
We helped clients multiply their website conversion rates through strategic design and UX optimization.
20%
Our marketing campaigns led to a 20% uplift in customer engagement across digital channels.
2K+
Delivered over 2,000 qualified leads through targeted funnels and smart automation.
120+
Our video content has earned 120,000+ views, driving brand awareness and audience retention.
“I recently had the pleasure of working with Chehak on a video demo project, and I was thoroughly impressed with her services.”
.svg)

Additional Resources
Access expert tips, trends, and strategies designed for small businesses. Stay ahead of the curve and make informed decisions with our comprehensive resources!