We typically respond the same day


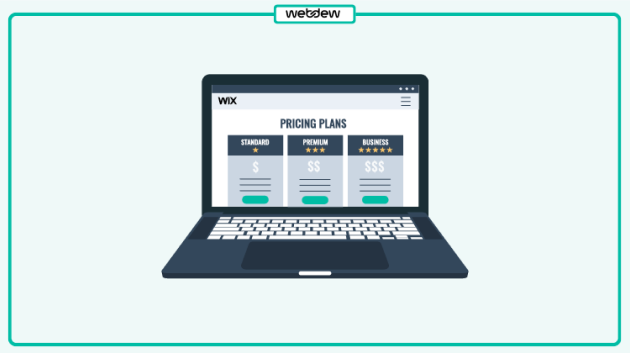
Want to take your Wix site from basic to brilliant?
In this advanced Wix tutorial, we’ll go beyond the beginner tools and explore powerful features like custom layouts, Velo development, and advanced SEO. If you want to explore our beginner’s guide then follow this step-by-step guide.
Whether you’re building for yourself or a client, this guide will help you unlock Wix’s full potential. Let’s dive in and level up your site!
Step 1: Picking the Right Starting Point
Challenge:
I initially began with the Wix ADI, which quickly builds a site using a few questions. However, it lacked the flexibility I needed for a highly customized website.
Solution:
If you started with Wix ADI but find it too limited for your needs, here are three solution paths based on how much flexibility and control you want:
1. Wix Editor (Standard Editor)
Yes, Wix Editor gives you much more freedom to customize design, layout, and functionality compared to ADI.
However, if you need responsive design control or complex layouts, even the Editor might feel limited; in that case, Wix Studio is the better choice.
1.1. Drag-and-Drop Editing
The Wix Editor’s drag-and-drop feature is suitable for users who want a fast and easy website without needing advanced customization.
It’s easy to drop specific elements into the Editor, but if you want to customize the preset elements, that’s where the problem arises. These whole sections, galleries, contact forms, blog layouts, etc, customizations are limited because they are locked, with spacing and padding, unless you recreate the section from scratch.
")
1.2. Deep Design Customization Options
Deep customization options are limited in Wix Editor. There’s also limited access to their internal structure, meaning you can’t constantly adjust spacing, reposition nested elements, or fine-tune their responsiveness across devices.

1.3. Advanced Functionality and Optimization Tools
While the design flexibility of Wix App Market apps is generally decent, it can sometimes feel constrained to templates or pre-styled components, much like the limitations seen with preset elements in the Editor.
Many of these apps are available for free, but unlocking advanced features often requires a subscription or premium plan.
For users who need full customization, Wix offers developer tools through Velo by Wix. This enables you to write custom JavaScript and access APIs, allowing you to create fully tailored features and app behaviors beyond the standard capabilities of the Editor.

2. Wix Studio (formerly Editor X) – Professional-Grade Customization
If you’re designing a responsive, scalable, or more complex website, Wix Studio is the most potent option. You can’t convert a Wix ADI or Wix Editor site to Wix Studio.
2.1. Responsive Design for All Devices
Wix Studio (formerly Editor X) is built with responsive design at its core, allowing you to create websites that adapt seamlessly to different screen sizes, desktop, tablet, and mobile.
Using breakpoints, you can customize the appearance of each element on different devices without affecting the others. This ensures a smooth and consistent user experience across all platforms.

2.2. Advanced Layout and Development Flexibility
Wix Studio enables you to build complex, scalable designs that surpass traditional website structures with the support of CSS Grid and Flexbox.
Additionally, Wix Studio supports custom code, API integrations, and dynamic content, making it ideal for projects that require unique functionality or backend connections.
This level of flexibility is perfect for developers and advanced users who need more than just drag-and-drop design.

2.3. Built for Professional and Collaborative Projects
Wix Studio is designed with professionals in mind, whether you’re part of a design team, a developer, or building websites for clients. It includes tools that support team collaboration, version control, and scalable project management.
The platform’s structure and features are ideal for handling large-scale websites, complex web apps, or multi-user environments.
Whether you’re managing a portfolio of client sites or developing a custom web application, Wix Studio offers the power and flexibility needed for high-level, professional work.
3. Solutions Without Switching from Wix ADI – Maximize What You Have
If you prefer to stick with Wix ADI, you can still enhance your site by using all available features strategically:
3.1. Customize Design Elements Within ADI
While Wix ADI (Artificial Design Intelligence) offers fewer customization options compared to the full Wix Editor, you can still personalize your site using the “Customize Design” panel located in the ADI dashboard.
This panel enables you to adjust key elements, including fonts, color palettes, section backgrounds, and layout styles, allowing you to tailor the look and feel of your site to match your brand identity or aesthetic better.
By thoughtfully tweaking font pairings, header sizes, and background styles, even using Wix’s built-in media and image library, you can create a visually compelling website that feels personalized, even within ADI’s simplified framework.

3.2. Enhance Functionality with Apps and Embedded Tools
You can access the Wix App Market to add features like forms, stores, chat, bookings, and more. These apps are either made by Wix or developed by third-party providers.
Some apps are free and can be developed by either Wix or third-party developers. Paid apps, on the other hand, fall into two categories:
- Apps that are included as part of your existing Wix premium plan (especially if Wix makes them).
- Third-party apps that require separate billing outside your Wix subscription.
This means that not all paid apps are included in your Wix plan; some may incur additional charges.
Even if a specific app isn’t available in the Wix App Market, you can still embed external tools manually using custom code or the HTML embed widget in Wix Editor. For example, you can embed a Typeform form even though it’s not a native Wix app.

3.3. Get Creative with Existing Sections and Visual Elements
ADI enables you to duplicate, reorder, and customize content blocks, including text, images, buttons, and galleries.
By rearranging these elements and strategically selecting layout options from the ADI section presets, you can create more sophisticated designs, such as multi-column layouts or call-to-action banners, even without switching to the Wix Editor.
Once uploaded to your Wix Media Manager, these assets can be easily inserted into ADI sections, giving your site a polished, professional look. This approach enables you to maintain complete creative control while operating within the streamlined ADI environment.
If you’re constantly fighting limitations, such as being unable to move elements freely or customize spacing in detail, it’s probably time to switch to the Wix Editor. You’ll retain your content and gain complete creative control.

Step 2: Creating a Responsive Design
Challenge:
Like many users, I faced mobile alignment issues and overlapping elements on smaller screens.
How I solved it:
1. Used Editor X’s Breakpoints to Customize Layout Individually
Editor X offers built-in breakpoints for desktop, tablet, and mobile views, allowing you to tailor your site’s layout for each device type.
This means you don’t have to rely on automatic resizing, instead, you can manually adjust how elements appear on different screen sizes.
For example, you might arrange elements side by side on a desktop but stack them vertically on mobile for better readability. By designing within each breakpoint, you ensure that your website looks clean, functional, and professional, regardless of the device on which it’s viewed.
2. Locked Proportions for Key Elements and Avoided Fixed Widths
To maintain consistent design across devices, it’s essential to lock proportions rather than setting fixed pixel widths. In Editor X, you can define dimensions using relative units like percentages or use “scale to fit” settings that adjust with screen size. This approach prevents content from breaking or becoming misaligned when viewed on different devices.
3. Previewed on Multiple Devices Before Publishing
Before making the site live, it’s crucial to preview it on various device modes, desktop, tablet, and mobile, to catch any layout issues or inconsistencies.
Editor X allows you to simulate how your site will look on different screen sizes directly in the Editor. This step helps identify overlapping elements, text that’s too small to read, or misaligned sections.
By carefully reviewing and adjusting the layout for each device type, you ensure a polished and user-friendly experience for all visitors before hitting publish.
Step 3: Powering Up with Velo by Wix
Challenge:
I needed a member-only dashboard, a searchable blog archive, and a custom event registration form; how can I build a website that includes all these features?
1. Navigating Form Customization Constraints in Wix Velo
I was building a custom form using Wix Velo and initially attempted to implement it using my methods. However, I quickly realized that Wix requires you to work within the structure of its built-in elements and APIs. While there’s some flexibility with CSS, it’s limited and must be used within the constraints of the platform.

2. Automating Routine Workflows with Scheduled Backend Tasks in Wix Velo
While building out a data-driven site, I needed to run daily updates and clean up outdated records. I quickly learned that Wix Velo’s backend allows you to schedule server-side functions, making it easy to automate repetitive tasks without manual intervention. With scheduled jobs, I was able to update CMS content, sync data, and manage backend logic reliably, all without needing user interaction.
3. Creating Personalized User Dashboards with Role-Based Logic in Wix Velo
When I needed to display different data for each user, like saved items, form submissions, or order history, I turned to Wix Velo’s ability to create dynamic, personalized dashboards. By combining the CMS with custom queries and role-based logic, I was able to create secure, user-specific views that adapt according to login status and user type. It took some setup, but the result is a seamless, interactive experience tailored to each member.
Step 4: Optimizing SEO
Challenge:
Wix users often say, “My site doesn’t show up on Google.”
My Fix:
1. Used Wix SEO Wiz for Initial SEO Setup
I utilized Wix SEO Wiz, an easy-to-use tool designed to guide users through the essential SEO setup process.
This tool helped me generate a personalized SEO plan by analyzing the site’s content and goals. It provided clear steps to improve site visibility, including optimizing keywords, enhancing site structure, and offering best practices.
Using SEO Wiz ensured that the foundation for ranking well in search engines was correctly established from the beginning.

2. Customized Meta Titles and Descriptions for Every Page
Understanding the importance of on-page SEO, I carefully crafted unique meta titles and descriptions for each page on the website. These elements are crucial because they influence how pages appear in search engine results and directly affect click-through rates.

3. Enabled Structured Data (JSON-LD) and Submitted Sitemap
I implemented structured data using JSON-LD through Velo, specifically for blog posts. This markup enables search engines to display rich snippets in search results, including article dates and authors, thereby enhancing visibility and user engagement.
Additionally, I submitted the site’s Sitemap via Google Search Console, ensuring that Google could efficiently crawl and index all the website’s pages.
This combination of structured data and sitemap submission optimizes SEO performance, helping the site get discovered more quickly.
4. Submitted Sitemap via Google Search Console
Submitting a sitemap to Google Search Console is crucial for ensuring your Wix site is indexed efficiently. Wix automatically generates a sitemap (yourdomain.com/sitemap.xml), which lists all your live pages and updates.
After connecting your domain, verify your site in the Search Console and submit the sitemap URL. This helps Google understand your site’s structure and crawl it more effectively, ensuring new content is indexed faster.
It’s beneficial when adding pages or blog posts in Wix. Additionally, Search Console offers insights into search performance, indexing issues, and mobile usability, making sitemap submission a crucial step in managing your Wix site’s SEO.
Step 5: Reduce Bounce Rates
Challenge: High Bounce Rates Due to Slow Page Loads
I noticed users were leaving the website quickly, often before interacting with any content. After reviewing the site’s performance using Wix’s built-in Site Speed dashboard and Google PageSpeed Insights, it became clear that slow load times were contributing to high bounce rates.
To address this, I implemented several Wix-optimized performance techniques that significantly improved speed and user experience.
1. Optimized Media Using Wix’s Image Tools and Avoided Heavy Animations
Wix automatically optimizes some media, but to further enhance performance, I manually compress images before uploading them to Wix. This helped reduce file sizes beyond Wix’s defaults.
I also avoided using Wix’s video backgrounds, and complex animation presets, which tend to slow down mobile and lower-end devices.
By keeping image-heavy pages lean and using simple transitions, I made the site faster while maintaining visual appeal.
2. Enabled Lazy Loading and Removed Non-Essential Wix Apps
Wix now supports lazy loading by default for images, which I verified was active to ensure content loaded only when needed.
I also reviewed the Wix App Market installations on my site. I removed third-party apps that weren’t significantly contributing to the user experience, such as redundant chatbots or outdated form builders.
Each additional app adds scripts to the page, and by streamlining to only essential tools, I reduced overhead and script conflicts, which in turn sped up performance.

3. Boosted PageSpeed Score and User Engagement
After implementing these Wix-specific optimizations, the website’s Google PageSpeed score increased from 61 to 89.
Not only did this reflect improved technical performance, but I also saw a decrease in bounce rates and an increase in session duration.
Thanks to Wix’s performance optimization tools and thoughtful content management, the site now loads faster, ranks better in search results, and delivers a smoother experience across devices.
Ready to build smarter with our Wix tutorial?
If you found this tutorial helpful, be sure to subscribe for more advanced Wix tips and download our free Wix Pro Checklist to guide your next project.
You can also contact us if you have questions or are interested in CMS services.
Dive Into our
Client Testimonials
Listen to business owners like you share how we’ve helped them grow. Your story could be next!


.svg)

“Recently we reached out to Webdew for a website inside of HubSpot and they also did some mocking automation for us.”

“Webdew team was quite honest and quite easy to work with in terms of taking feedback implementing it, showing that it doesn’t happen again and things like making sure that it meets our expectations.”

“We worked with webdew to help us build our HubSpot website and they did an amazing job with it. They were very quick.”

“webdew has helped us optimize the sales and marketing processes, and this is automating a lot of processes.”

“Hi everyone my name is Kara and I work as a channel consultant at HubSpot Singapore. I’ve been working closely with webdew agency”

“Hi my name is Christian from OpenDoors Mortgage team and I’m in the mortgage business and just trying to work on new projects and kind of incorporating HubSpot for my operations”

“I’m one of the technology directors for Travelopia. We are the largest experiential travel company in the world. We’ve engaged webdew recently, not recently, it’s been about a couple of quarters now.”
“We worked with Chehak over the past several months to create a series of animated videos for an academic planner that we produce. And from the very beginning, she was absolutely professional and a pleasure to work with.”


6x
We helped clients multiply their website conversion rates through strategic design and UX optimization.
20%
Our marketing campaigns led to a 20% uplift in customer engagement across digital channels.
2K+
Delivered over 2,000 qualified leads through targeted funnels and smart automation.
120+
Our video content has earned 120,000+ views, driving brand awareness and audience retention.
“I recently had the pleasure of working with Chehak on a video demo project, and I was thoroughly impressed with her services.”
.svg)

Additional Resources
Access expert tips, trends, and strategies designed for small businesses. Stay ahead of the curve and make informed decisions with our comprehensive resources!