We typically respond the same day

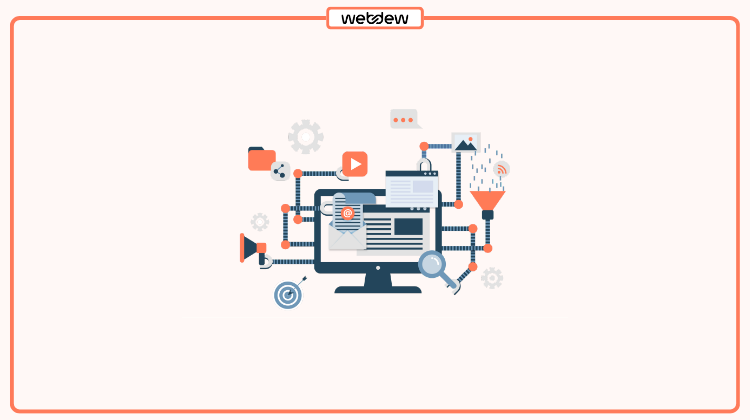
Lead generation is what marketers live for. And there’s no denying the fact that forms play quite a significant role in generating a lead. After all, that’s how you get the visitor’s contact and then convert them into a lead.
Quick question: Have you ever filled a form that goes beyond a few basic questions? Well, no one likes to fill long forms, irrespective of how badly they want a service. So, if your download form is too long, it may discourage the visitor from registering. And, if your form is too short, your sales team may not get all of the information they need for a quality lead.
That’s quite a dilemma, isn’t it? Well, enters Smart Forms. If you are currently a HubSpot user and have access to smart content, then congratulations!
Now you must be wondering what are Smart Forms? How to create HubSpot Smart Forms? And how to use these Smart Forms effectively to increase the number of lead conversions?
Let’s take these questions one-by-one and get started with HubSpot Smart Forms.
What are the Smart Forms?
Smart Forms in HubSpot allow you to change entire forms as per the website visitors and the characteristics of a particular viewer. You can create Smart Forms based on the below-mentioned criteria types:
Referral Source: Show the content to the visitors based on how visitors found your site.
Country: Provide the content to the visitors based on their country. The IP address of the visitors can easily determine the country.
Contact list membership: Show the content based on whether the contact is in your HubSpot database list or not.
Device type: This smart content is created on the based on the devices used by the viewers. Indeed, we cannot guarantee accurate segmentation, but it will give you a closer idea of your viewers.
Lifecycle stage: It is another criteria based on which you can provide relevant content to the people by considering their current life cycle stage property.
Preferred language: Another way you can personalize your contact in your HubSpot database is on the based on the language within the user’s web browser.
Well! Based on all the above-mentioned criteria, you can easily create Smart Forms that further helps catch the visitor’s attention and capture more leads.
If I am not wrong, you might be excited to create a Smart Form for your landing page, website page, or in your template. Want to know how? Get into the next section of your blog.
Step by Step Guide to create Smart Forms in HubSpot
To create smart forms in HubSpot on your landing pages or website pages, make sure you follow each step without any hassle.
Create a Smart Form on Website Page or Landing Page.
1- Firstly, login into your HubSpot account. Navigate to Marketing and then click on the Website page/Landing page.

2- Choose any page and click on the Edit button. You will be redirected to the page added below:

3- Navigate to the left side of the page and click on the Form Module.

4- You will be redirected to the page where you have to enter the form name and then click on the make module smart button.

5- After clicking on the smart add rule, you will be redirected to the page added below:

6- Here, choose the criteria you want your content based on and then click on the create button.
7- Navigate to the left side of the page editor and click on add smart rule button under the options tab. If you want to update your smart rules, like delete all rules or reorder rules, click on the manage smart rules button.

8- Choose the device type and click on the Save button.
9- Before publishing, makes sure you view the preview link by clicking on the page preview button.

10- Once you are satisfied with the page, click on the Publish button added at the top right corner of the page.
Create a Smart Form in your Template
Now let’s go through the steps which will help you create Smart forms in your template accurately and without any issue.
1- Login into your HubSpot account. Navigate to Marketing. Click on Files and Templates and then choose the Design Tools option.

2- Choose the template module you want to make smart and click on the form module. You will redirect to the page added below in the screenshot.

3- Navigate to the right module inspector and click on the Form drop-down menu and choose the default form for the module under the default content section.
4- Click on the More button and choose to make the smart module option from the drop-down list.

Source: HubSpot
5- Select the option you want to base your smart content on, and then click on the create button.

6- Hover over the right side of the page and create your smart rules under the default content section. You can add a rule, reorder rule, and delete all rules.

Source: HubSpot
7- Before clicking on the Publish button added at the top right corner of the page to make changes, make sure you check the preview link.

5 Effective Ways to use Smart Forms to capture more Leads
Now that you are familiar with creating a Smart Form let’s learn some ways by considering which you can create forms in a creative way that will further help you capture more leads in less time.
Just think a moment; what the primary objective of all the marketers is? If I am not wrong, then most marketers aim to capture more leads and increase their sales. If you also aim for the same, let me tell you that forms are one of the easiest and most effective ways to capture quality leads.
If your form is accurate, then it would be easy for you to encourage the visitors and convert them into the lead. HubSpot forms are not only free but also allow you to convert anonymous visitors into leads.

Source: slideteam
So, to display the HubSpot forms in the right way, make sure you keep the below-mentioned tips in mind.
Way-1 Customize Form to a specific Language
Are you planning to run a marketing campaign in various countries? Then Smart Forms will help you customize your form based on the location of the visitor.
Say that if your visitors are from France, you can display your form in France, similarly with English and Spanish, etc. Suppose you customize your form to a specific language. In that case, you can easily create a personalized experience for your visitors, which will further help you achieve your goals and reach the business target.
Way-2 Personalized Form on Paid Campaigns
Whenever you create Smart forms, make sure you customize the CTA’s. Copying it within your form makes it visible for paid ads, which will further help you promote your content.
Whenever you make CTA’s, make sure to keep it simple or very simple. It will help the visitors perform the following steps efficiently. To make the form more engaging, you can also use visual cues or specific colors to make visitors familiar with it, especially when they land on the page.
To personalize the form on paid campaigns, click on the Make smart button, use the Referral Source option and select the option for which you want to display the form for.
Way-3 Personalize Forms as Events
When we talk about discovering and generating leads, events play a significant role. And to improve the events, you can use Smart Forms for better conversions.
Let’s say you have conducted a webinar and have a list of all the people who have filled their details and attended a webinar. Then based on that particular list, you can send personalized messages and engage the viewers.
Well! There are various ways with which you can create a personalized form. Some of them are:
- Adding name in the form title
- Providing more questions that were not added in the webinar
- Discuss something that was included in the webinar and related to the event.
You can follow more ideas that will help you increase the conversion rate and better customer experience.
Way-4 Keep your Lead Lifecycle Stage in Mind
By understanding the current stage of the visitor, it would be easy for you to provide the right content to the right visitor at the right time. To achieve this goal, you can use Smart Form. The Smart Form you create will adapt to your leads according to each stage of the funnel.
This approach will help you make relevant conversions with leads, prospects and customers. For this, you have to go on the Landing page, and click on the Make smart button.
Personalize the form by choosing the lifecycle stage. Also, you can create multiple versions on the basis of the lifecycle stage of the prospects.
Way-5 Always add a shorter Form for Mobile
There are around 62% of the people who use smartphones and expect mobile-friendly experiences. Besides content on your landing page, forms also play a significant role. Whether you are a professional or an enterprise tier, Smart Forms will help you display the forms according to mobile visitors.
Whenever you create a form, make sure it is shorter so that it becomes easy for the people to complete it accurately. To do this task, click on the “Mark Smart” button, choose the device type, and select mobile. It will help you create forms that are specifically for mobile visitors.
So, keep all the things in mind to make your Smart Form efficient, which will further help you capture more leads easily.
Know more about- Guide to effectively use HubSpot Pop Up Forms for better conversion.
In a Nutshell
Hopefully, all the points mentioned above will give you a clear idea about creating Smart forms in HubSpot and various ways by considering which you can produce the suitable form and capture quality leads effortlessly.
Still, if you face any challenge while creating this form or want to know something about HubSpot, please feel free to contact us.
We are HubSpot Platinum partners and ready to resolve all your queries 24*7.
Dive Into our
Client Testimonials
Listen to business owners like you share how we’ve helped them grow. Your story could be next!


.svg)

“Recently we reached out to Webdew for a website inside of HubSpot and they also did some mocking automation for us.”

“Webdew team was quite honest and quite easy to work with in terms of taking feedback implementing it, showing that it doesn’t happen again and things like making sure that it meets our expectations.”

“We worked with webdew to help us build our HubSpot website and they did an amazing job with it. They were very quick.”

“webdew has helped us optimize the sales and marketing processes, and this is automating a lot of processes.”

“Hi everyone my name is Kara and I work as a channel consultant at HubSpot Singapore. I’ve been working closely with webdew agency”

“Hi my name is Christian from OpenDoors Mortgage team and I’m in the mortgage business and just trying to work on new projects and kind of incorporating HubSpot for my operations”

“I’m one of the technology directors for Travelopia. We are the largest experiential travel company in the world. We’ve engaged webdew recently, not recently, it’s been about a couple of quarters now.”
“We worked with Chehak over the past several months to create a series of animated videos for an academic planner that we produce. And from the very beginning, she was absolutely professional and a pleasure to work with.”


6x
We helped clients multiply their website conversion rates through strategic design and UX optimization.
20%
Our marketing campaigns led to a 20% uplift in customer engagement across digital channels.
2K+
Delivered over 2,000 qualified leads through targeted funnels and smart automation.
120+
Our video content has earned 120,000+ views, driving brand awareness and audience retention.
“I recently had the pleasure of working with Chehak on a video demo project, and I was thoroughly impressed with her services.”
.svg)

Additional Resources
Access expert tips, trends, and strategies designed for small businesses. Stay ahead of the curve and make informed decisions with our comprehensive resources!