Perhaps the quickest approach to add a touch of awe and style to your videos or pictures in After Effects is to utilize the Blending mode. You can transform the overall appearance and feel of your composition with only a few clicks.
From creating really cool and fun double exposures to composing outstanding VFX, Blending modes are incredible while working with multiple layers. Of course, no two blending modes are the same. Some blending modes may work better than others at performing certain tasks.
Like any other Motion Graphics designer, I, too, have a few go-to blending modes. Let’s have a look at them and how they can transform an image.
What are Blending Modes?
Blending modes are ‘mini effects’ that can be quickly applied to any layer in your composition to make it connect with the layers underneath. Blending modes can fill in as a fast keying utility, a shading effect, or even an outlining tool.
Applying blending modes is indeed the most foolproof way to add that ‘wow’ factor in your composition without really having to get too deep into the program.
The name says it all, you simply have to blend or add a new layer to your existing composition, and there you have it- An entirely new masterpiece!
Top 6 Blending Modes in After Effects
Below, I’ve listed six of my most favorite Blending tools in After Effects, one of the most popular Graphic design software.
Screen
Screen is a blending mode that you can use to get rid of the dark elements of your image. It allows you to add elements on a black background into your picture. This blending mode is often used in a VFX setting as most VFX elements typically come with a black background.
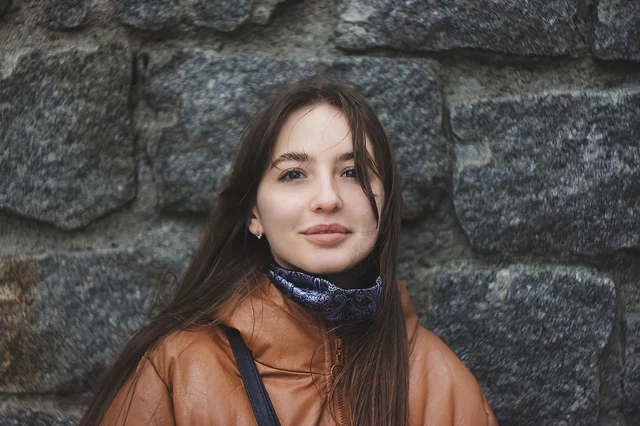
For instance, let’s take an image with a dark background.

Let’s take another image with some element, for instance the snow element.

With the Screen blending effect, you can completely transform the appearance of the first image. Simply add the screen transfer mode, and voila, magic! It appears like the girl is enjoying the snowfall.

Multiply
The Multiply blending mode is entirely contrary to Screen. Rather than removing out the dark elements, Multiply takes out the lighter aspects of your image. While you can use Multiply for any circumstances, I often use it to add a grungy touch to my images.
For instance, consider this image of a honey bee taking nectar from a white flower.

And suppose you want to add this shabby or grungy effect to the image.

Add the Multiply blending effect, and as you can see, there’s a darker, grungy effect to what previously was an image with a bright and vibrant appearance.

Add
Similar to the Screen blending mode, the Add transfer mode also leaves the image highlights while eliminating the darker elements. Though, Add progresses one step further. And as the name indicates, it adds its color values to the image, making the image increase significantly in terms of brightness.
You can use this blending mode effect for practically any number of purposes. However, I often end up using the Add blending mode to add lighting effects in my composition.
Take this wolf-dog image, for instance.

Now, let’s see what the picture would look like when a ‘Hipster’ style light leak is masked on top.

Simply apply the Add blending mode, and voila, now it looks like the wolf-dog is gazing through the dawn.

Classic Color Burn or Color Burn
Similar to Multiply, the Color Burn blending modes will darken your image. Though, the difference lies in the fact that Color Burn itself in a way that it blends with the background. As the name suggests, it creates a burned look, making it perfect for a vintage look.
For instance, let’s consider this bright image of two elephants.

Now, we will use the Color Burn effect to add a vintage look to it.

Voila, doesn’t the picture look so different now?

Overlay
Overlay adjusts the color of the mid-tones while maintaining the light and dark elements of an image. An overlay is often used to add stylized elements to your composition.

Lets’ see how Overlay blending mode transforms an image.

Quite magnificent, isn’t it? The added hues have made the image much more vibrant.
Soft Light
Soft Light is pretty similar to the Overlay blending mode. Though, Soft Light tends to be quite subtle, while Overlay is more prominent.
Let’s take the same image, for instance.
If you notice carefully and compare the two pictures, you will understand the difference between the two.

Watch this video, to see the Blending Modes in action.
Some Tips to keep in Mind
Wrapping Up
Well, these were only a few examples of Blending modes in Adobe After Effects. However, there are various other Blending modes that can be applied to get the desired outcomes.
Remember, no two blending modes are the same or will give you similar output. The most excellent aspect of using the Blending modes is that they are pretty fast to apply as well as modify. And you can transform the overall appearance of an image with just one click.
And at last, I would say, have fun, experiment, and explore the magical world of graphics that After Effects has to offer.
Not too sure about doing everything on your own? Looking for a video production agency to handle things for you? Well, get in touch with us now!
Editor: Richa Sharma