If you want to remove your image’s background in a jiffy with Photoshop, this guide is for you.
Photoshop provides multiple video editing techniques to eliminate unappealing or unwanted backgrounds from your images.
The options can include simple and complex techniques, from the Remove Background button to the Background Eraser feature.
This guide covers one useful marketing graphic design tip for marketers, online business owners, and designers: Using Photoshop to remove background from images in Photoshop quickly and easily.
Get started with the Background Removing tool
The Remove Background tool offers the easiest way to remove your image’s background in Photoshop if you’re not keen on getting clean edges.
Follow these easy steps on how to remove background in Photoshop with the Remove Background tool.
Step 1: Open the image you want to edit in Photoshop and navigate to the Layer panel on the right-hand side.
Press Ctrl+J (Command+J for macOS) to duplicate the current layer.
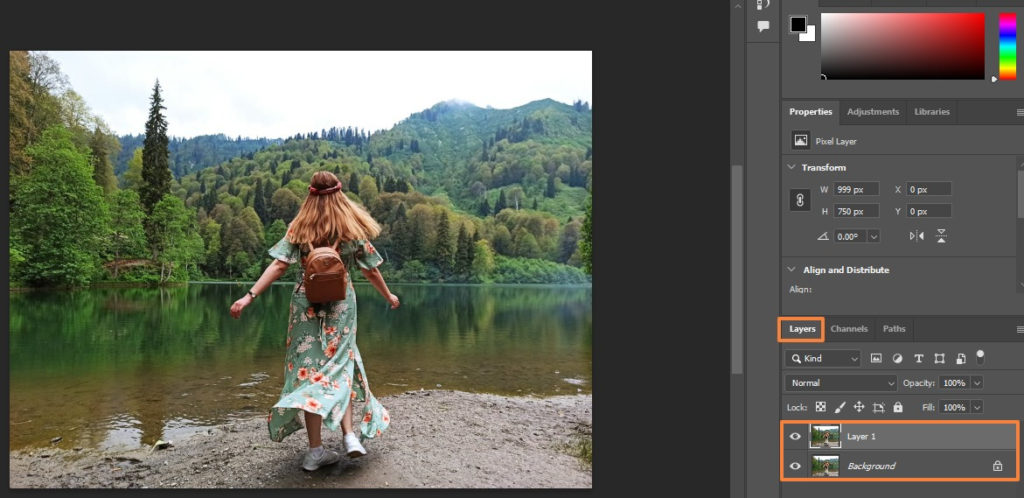
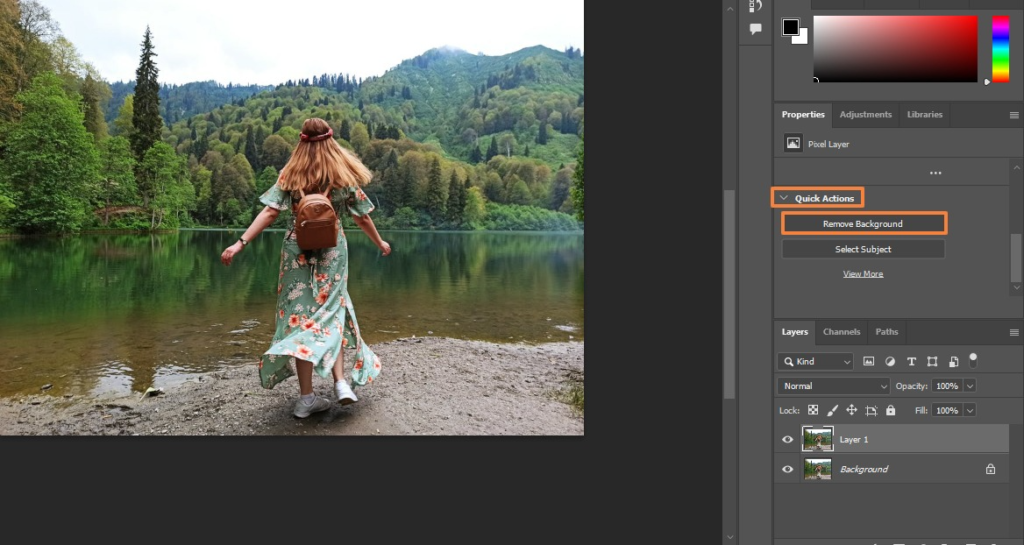
Step 2: Click the Remove Background button under the Quick Actions panel.
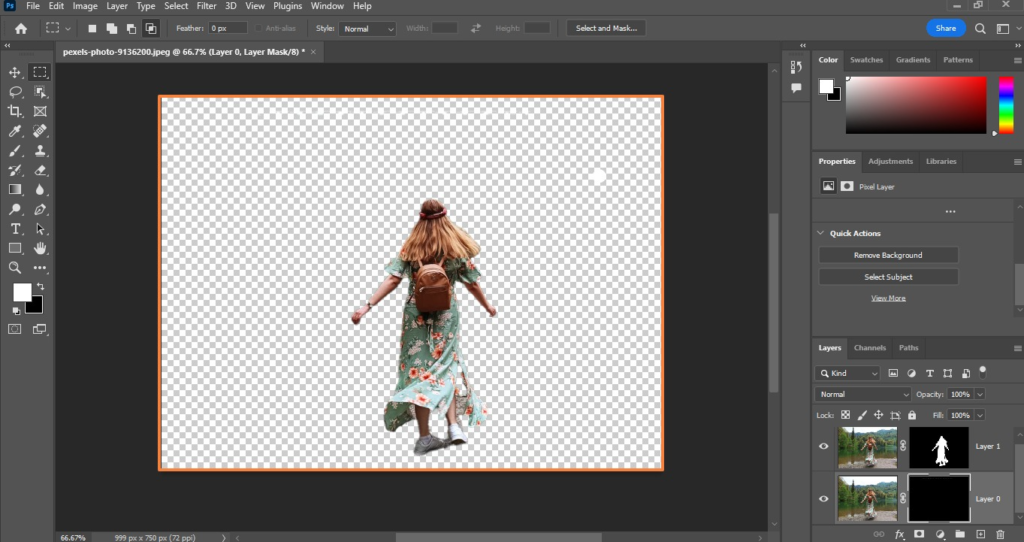
There you have it. You’ll have the image with the background removed within a few seconds.
Using the Quick Selection option
While you can always work with professional graphic artists or outsource photo editing for photographers, learning to remove image backgrounds in a rush is a valuable skill to have.
Photoshop’s Quick Selection tool is another easy way to remove backgrounds on your images easily.
The tool uses Artificial Intelligence (AI) to determine (in real-time) where the subject’s edges and the background’s beginning fall.
Quick Selection works best for images with a clear difference between the foreground selection and background.
Images with too much similarity within the pixels can confuse the tool. You’ll need to add and subtract elements until you get it right.
Follow the steps below to use the Quick Selection tool to remove your image’s background.
Step 1: After opening your image in Photoshop, click the Quick Selection tool in the left-hand toolbox menu.
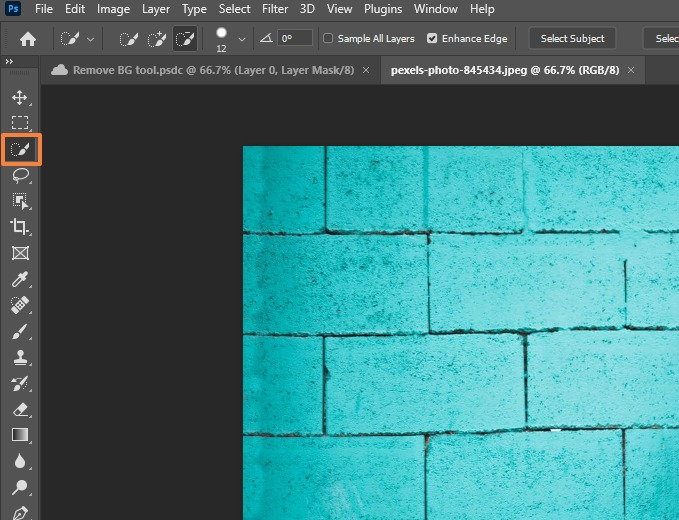
Select Enhance Edge in the Options bar to get smoother and better quality selection edges.
Step 2: Click the button and move the pointer over your selected areas. Image editing requires precision and attention to detail. The tool finds tones matching your selection until it determines the edges.
You can click and drag over another area in the image to add to your selection.
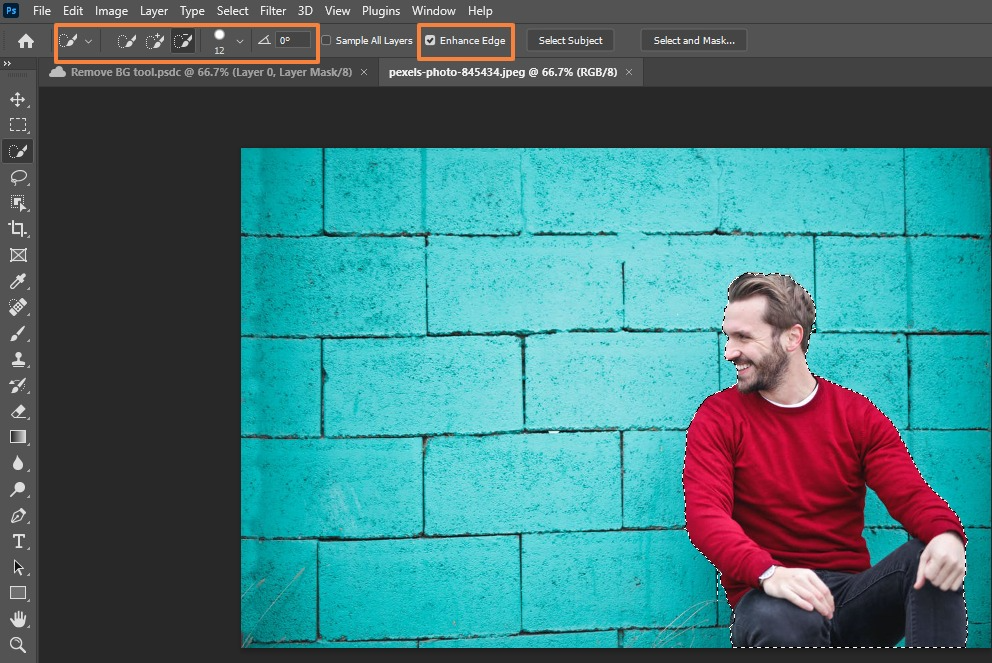
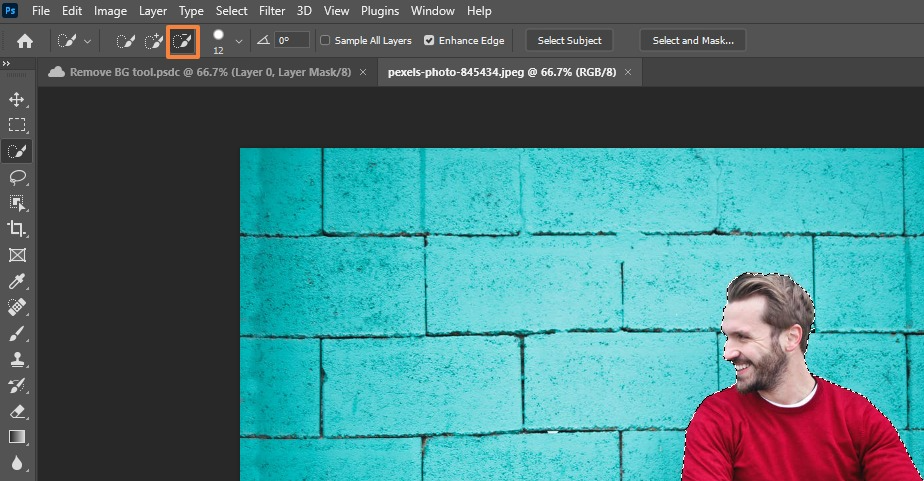
If the Quick Selection tool goes beyond your selection, switch to the Minus option in the Options bar to deselect the areas you mouse over or adjust the areas you don’t want to include in the selection.
Step 3: Once you’re done with your selection, click Select>Select and Mask from the menu or click the Select and Mask button under the Options bar.
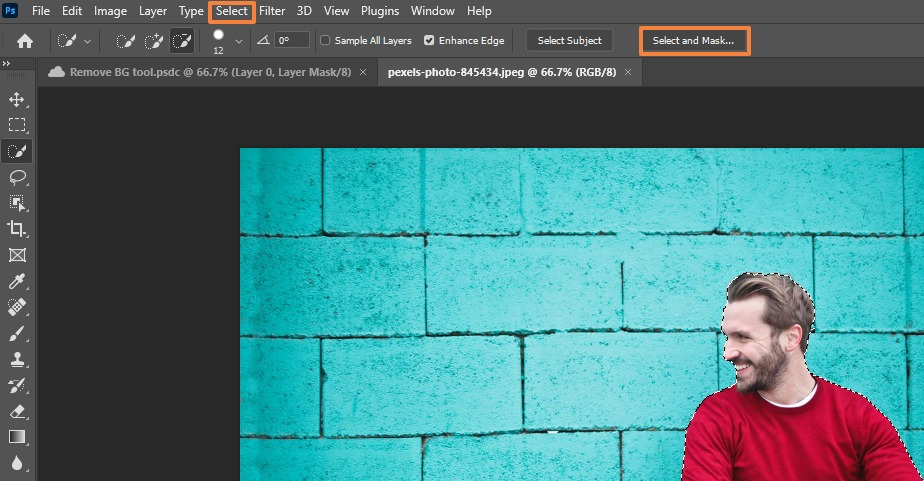
You can also press the shortcut keys Alt+Ctrl+R.
Step 4: Add some final touches by refining the edge and modifying the global adjustments accordingly.
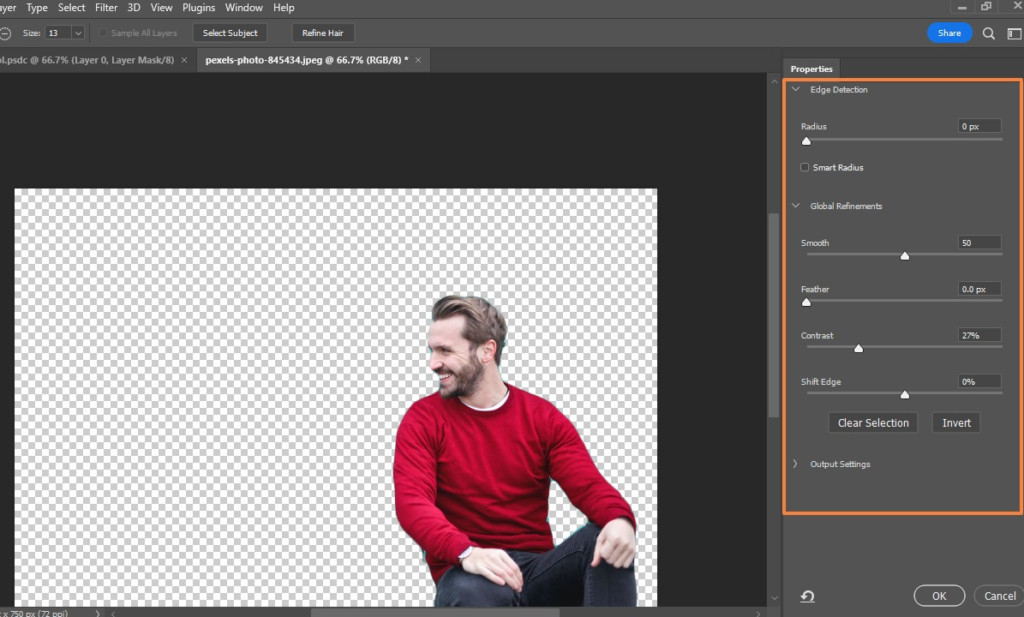
Step 5: Under Output Settings, click Output To and select Layer Mask from the dropdown.
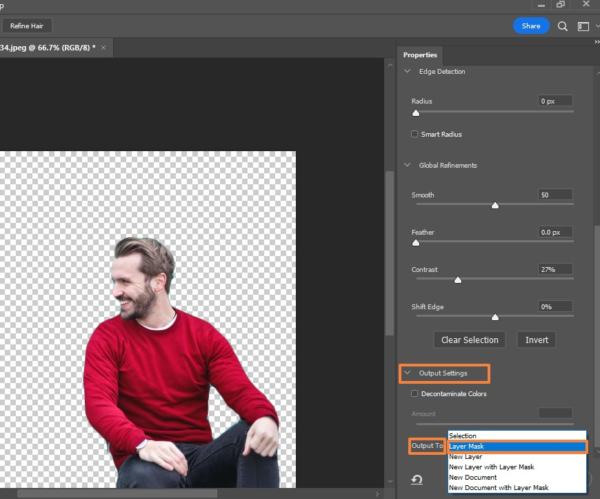
Click OK when you’re done and save your file.
Using the Pen tool
Adobe Photoshop’s Pen tool lets you draw around an image’s area with a combination of flexing curves and straight lines.
Using the Pen tool for images with sharp edges and post-processing is best. You can toggle between the two options by moving your mouse over a node and pressing the Ctrl key.
The tool creates a path around the subject, and you can make the path as you draw the lines.
Using the Pen tool is pretty intuitive, but you can start by following these steps.
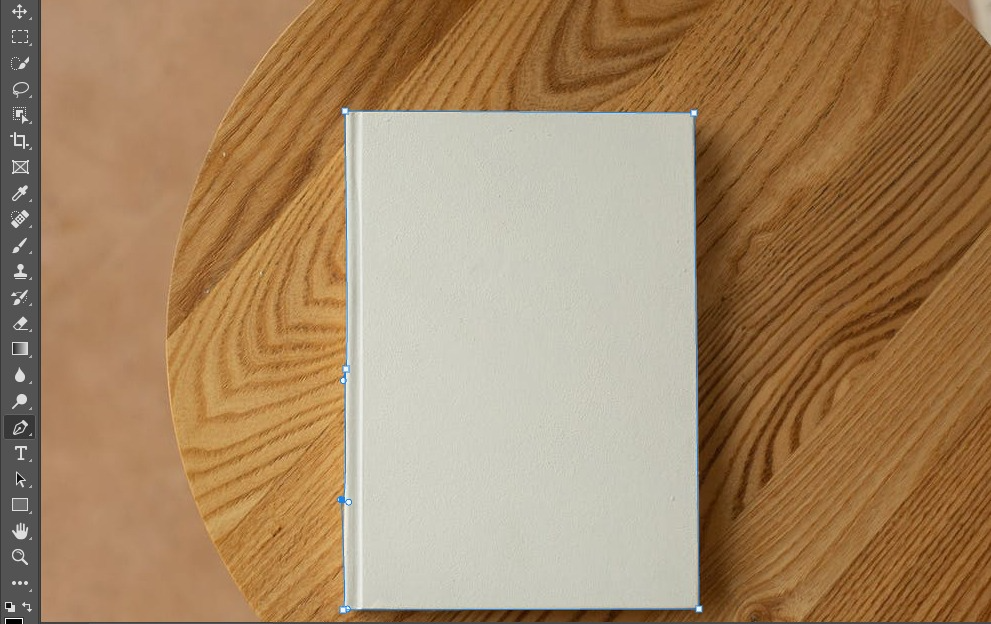
Step 1: Create a Path (clipping path) using the Pen tool on the toolbox.
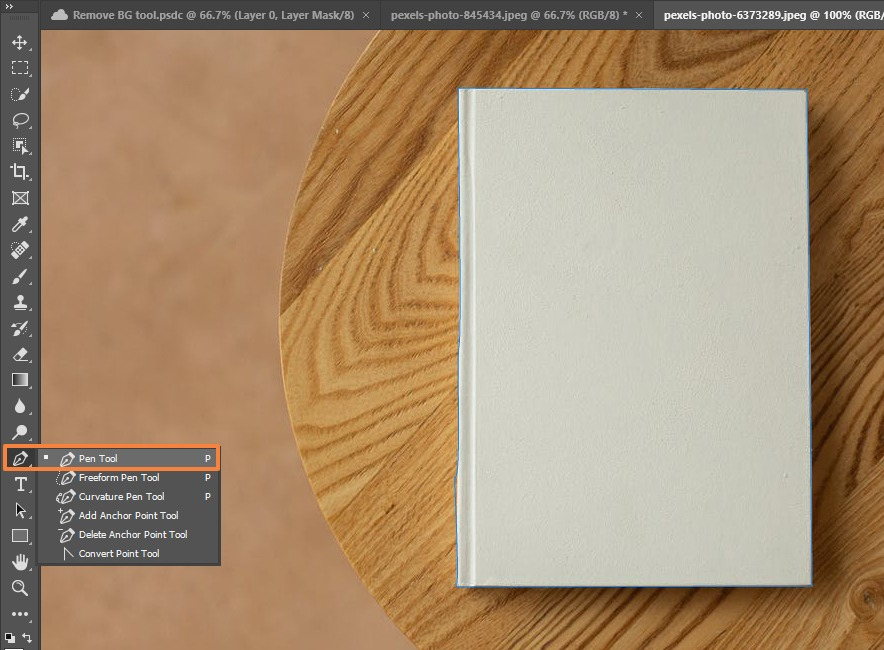
Draw the lines perfectly along the edges. Zoom in as close as possible to do so.
Step 2: Right-click on the selection and select Make Selection….
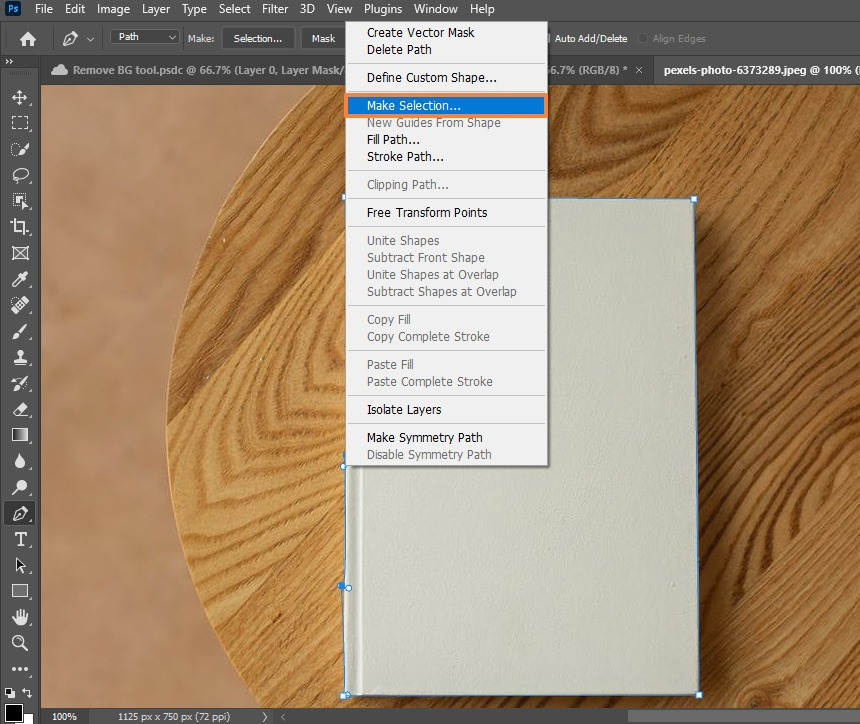
You can adjust the Feather Radius of the edges to make hard edges look less rough and unnatural, especially against bright backgrounds.
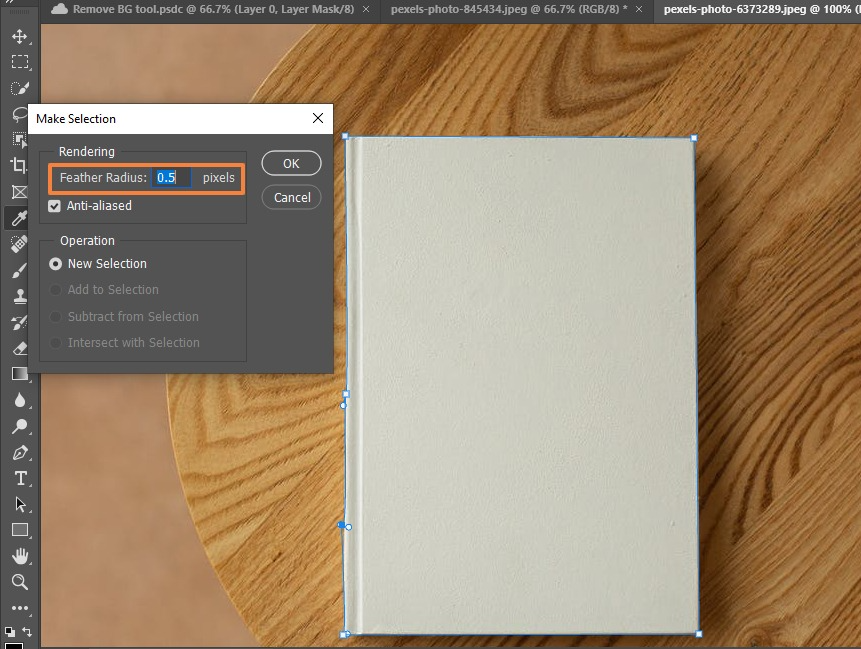
Click OK and save the path.
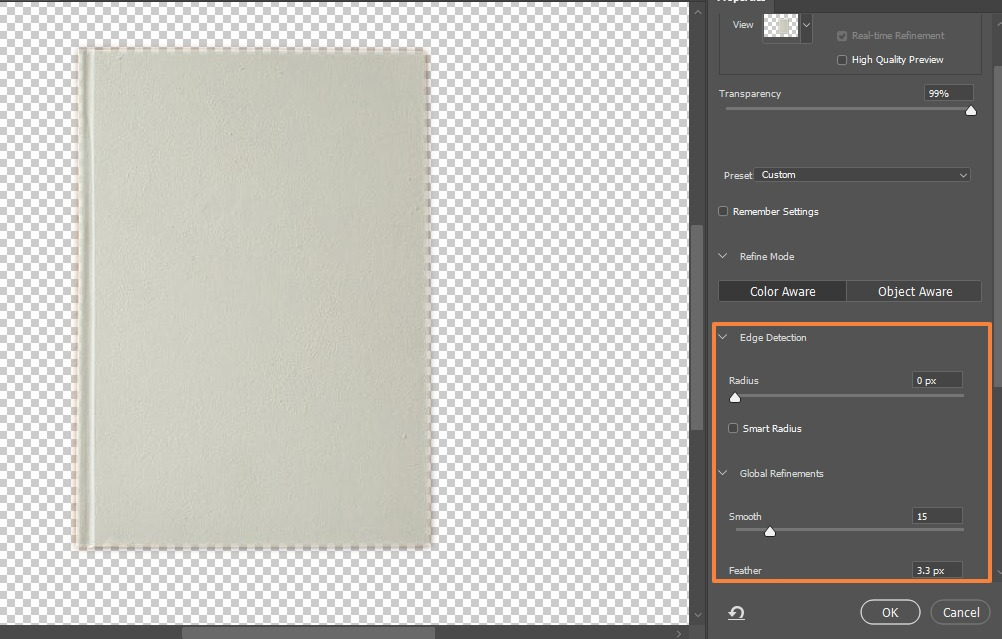
Step 3: Create a layer mask, modify the edge detection, and apply other refinements as you prefer.
Using the Background Eraser feature
Use the Background Eraser tool to eliminate backgrounds in images with multiple fine details between the background and subject.
The tool works by taking the hue sample at the centre of the brush and selecting similar (or the same) coloured pixels as you move your mouse.
Below are the steps to use Photoshop’s Background Eraser tool.
Step 1: After opening your image in Photoshop, look for the Background Eraser tool in the left-hand toolbox menu. It might be in the Eraser sub-menu if it’s not visible.

Step 2: Place the brush (your mouse) over the color you want to remove and click and drag to start erasing.

Below are several tips when using the background eraser tool.


Step 3: Click the Protect Foreground Color option if there’s too close a match between the subject and foreground color and your subject keeps getting wiped out.

Then, press and hold the Alt+Windows (or Option for macOS) keys to use the eyedropper tool to sample the hue you want to keep protected.
Step 4: Do some finishing touches and final adjustments. Save your file once you’re done removing the background.

Tips to refine your selection
No one method of removing backgrounds from images with Photoshop is perfect. Depending on your skill level and technique, some parts of the subject might get cut off, or several areas can be left with colours between hair strands.
You can also work around this by making your initial selection and clicking the Select and Mask button. Doing so brings up a new set of options that let you tweak your selection’s edges or modify the edge’s nature.
For instance, you can raise the contrast to make the edge harder or feather it to make it softer. Photoshop away your image background easily.
All set to remove backgrounds professionally?
Removing backgrounds from your images opens many creative endeavours, from marketing to graphic design. Photoshop offers many ways to remove your image’s background.
Simple tools and techniques can make the background removal process quick and easy, but the more complex approaches can offer better quality and precision.
So, take your pick and choose the background removal tools and methods in Photoshop that best fit your needs. Still need any help? feel free to contact us.